If you’re ready to look better on Zoom, or if you want to start recording YouTube videos or podcasts – a relatively small investment will significantly level up the video and audio that you can produce.
Over the past few years I’ve tried a bunch of options – here is what I’m using today to look professional on Zoom and when recording Acquisitions Anonymous.
Camera / Video
Most webcams aren’t designed to produce great video, they’re designed to be small and portable. The sensor in your webcam (whether it’s built into your laptop or sitting on top of your monitor) is tiny, which means it doesn’t capture a lot of light. The lens is small and plastic, which means it can’t produce the bokeh effect (aka “blurry background”) that is the signature of great looking video. If you want your video to look good, you need to upgrade your camera.
If you want to look as legit as your favorite video podcasters, you need a camera with a large sensor (to let in more light), plus a lens with a low f-stop (again, more light) and short focal length (to get that beautiful blurry background aka “bokeh”).
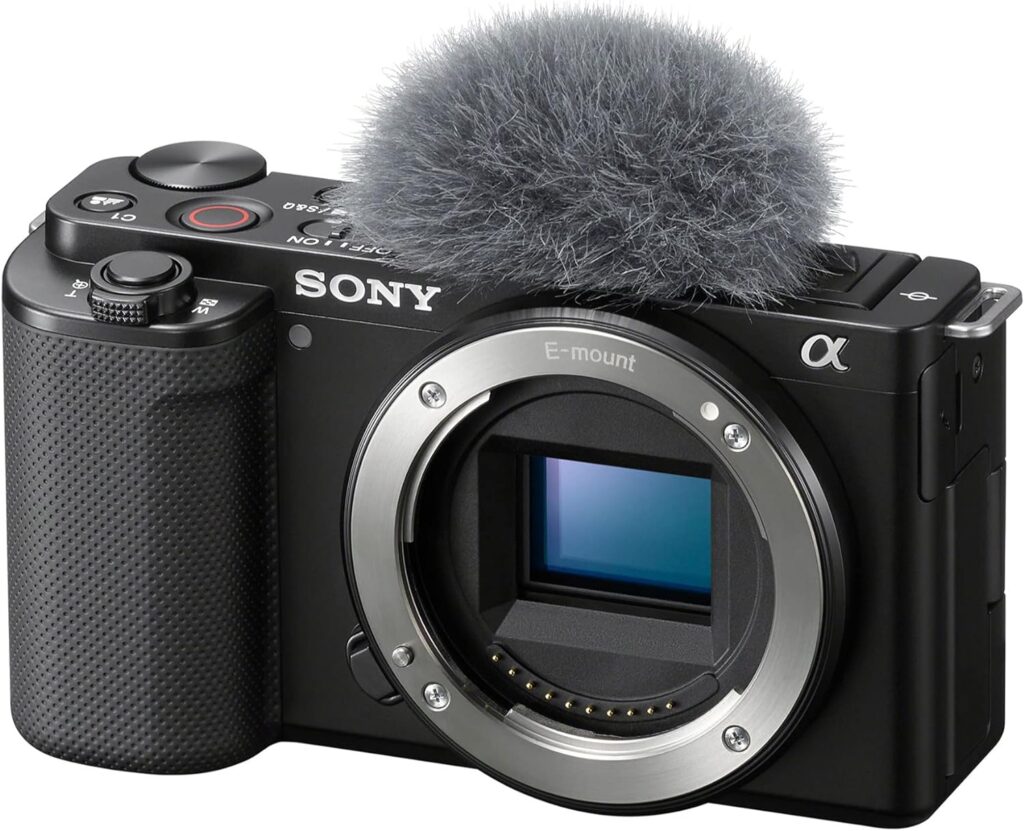
Top of the Line / Professional (this is the setup I use): Sony ZV-E10 Camera ($698 new, or ~$550 used on Ebay) and the Sigma 16mm f1.4 DC DN Lens ($394 new, or ~$300 used on Ebay)
The Sony ZV-E10 hits the sweet spot of all the modern features you need, none you don’t, and not too pricey (you can easily spend thousands on a camera body). The Sigma lens linked above is perfect for streaming and will give you a great natural look with nice bokeh. You will need an inexpensive HDMI capture card + cable to get the video stream out of the ZV-E10 and into your computer – see below.
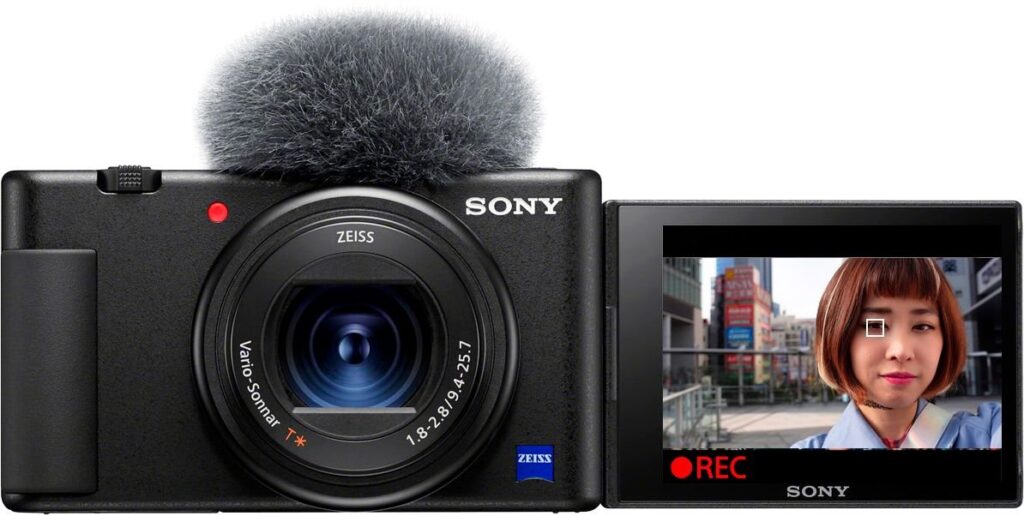
Best for the Pro-sumer: Sony ZV-1 Camera ($648 new, or ~$400 used on Ebay)
If you’re not quite ready to spring for the Professional setup above, this camera will get you 85% of the way there for about half the price. The ZV-1 is designed specifically for streaming and it will seriously upgrade your video quality (especially when paired with good lighting, see below). It has a built-in zoom lens that helps create the portrait-style bokeh effect, plus tons of pro-level settings to tweak your video. Or just set it on auto and you’ll look great right out of the box. You will need an inexpensive HDMI capture card + cable to get the video stream out of the ZV-1 and into your computer – see below.
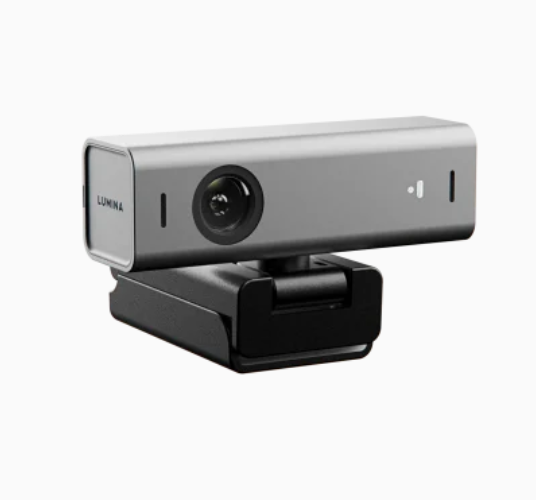
Best Enhanced USB Webcam: Lumina Webcam ($175)
If you don’t want to bother with a “real” camera, Lumina’s webcam is pretty impressive for such a small package. It has AI built-in that mimics your phone’s “portrait-mode” setting to create video that really stands out on Zoom. I’ve gotten multiple compliments when using the Lumina on group calls – people think I have a much more expensive camera. It’s not high enough quality for content creation or YouTube (in my opinion) but it’s a great upgrade for video conferencing (especially if you dial in your lighting). I use this for travel.
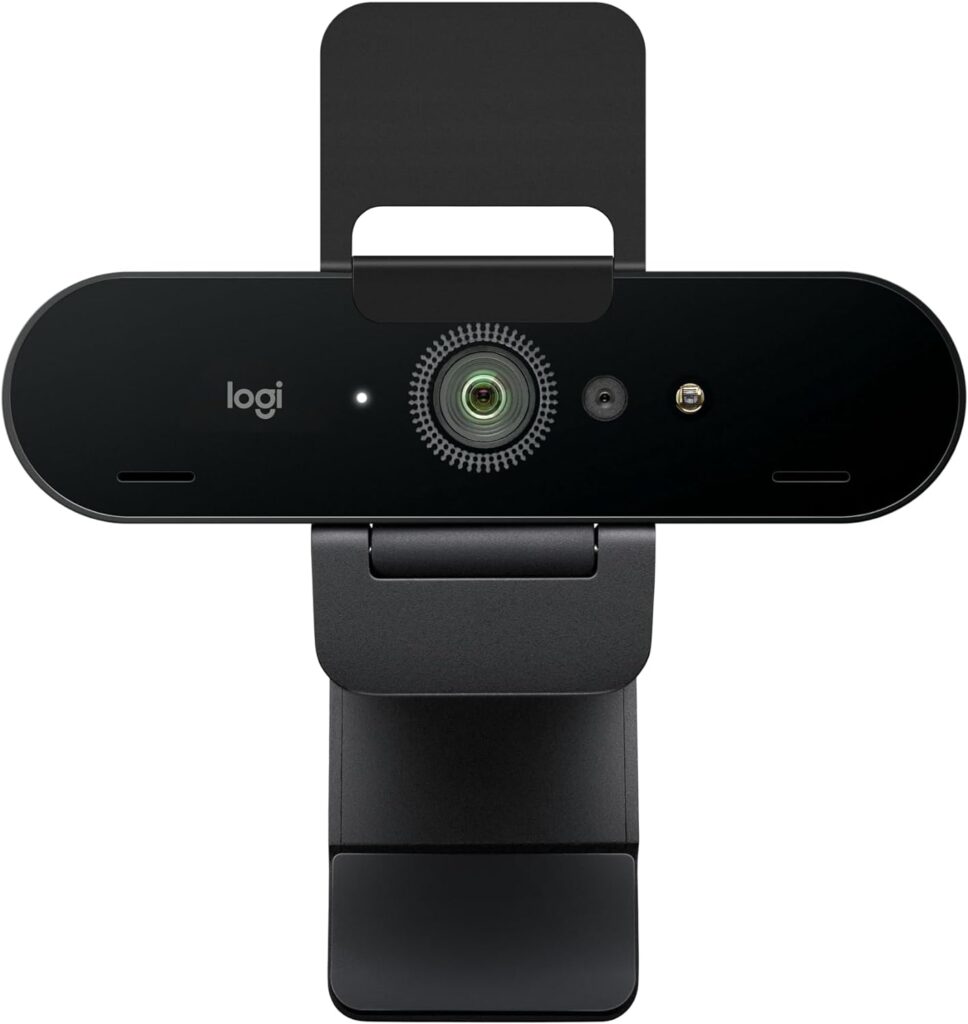
Best Traditional USB Webcam: Logitech Brio 4K ($140)
If the Lumina is out of stock or you don’t want a webcam that requires special software, Logitech’s Brio 4K is the best quality webcam you can buy. It’s plug and play on every OS, and will “just work” on any computer. It won’t create any portrait-style bokeh, but you will look as good as a traditional webcam can make you.
Lighting
We can’t talk about video without talking about lighting. If your lighting is terrible, even a high quality camera won’t be able to help you. In fact, I’d suggest upgrading your lighting even before upgrading your camera – great lighting can help you get the most out of whatever camera you already have.
Best for Most People: Elgato Key Light Air ($109)
Elgato’s Key Light series are very cool because they are temperature adjustable and wifi-controlled, meaning you can tweak your light’s brightness and color temperature using an app on your computer or phone. They’re also compatible with Elgato’s nifty Streamdeck Mini.
I find the “Air” model is in the sweet spot for most people, but they also have the brighter regular Key Light ($159) and the battery powered Key Light Mini ($79).
Best on a Budget: Any non-wifi key light from Amazon (~$40)
You can find tons of off-brand key lights on Amazon that probably use exactly the same LEDs as the Elgatos. Some even offer wifi control with their own app. Just look for color temperature adjustability and at least ~1400 lumens. I’ve seen good products from Viltrox and Neewer. But I like the Key Light series better because they are compatible with the Streamdeck ecosystem, but if that doesn’t matter to you you can save a bit of money and choose a different brand.
Microphone / Audio
The microphone built into your laptop or webcam is terrible and makes you sound like you’re calling into a radio show from 1980. A dedicated USB mic will go a very long way to making your voice sound like it belongs on a podcast – even if you’re just doing a Zoom call.
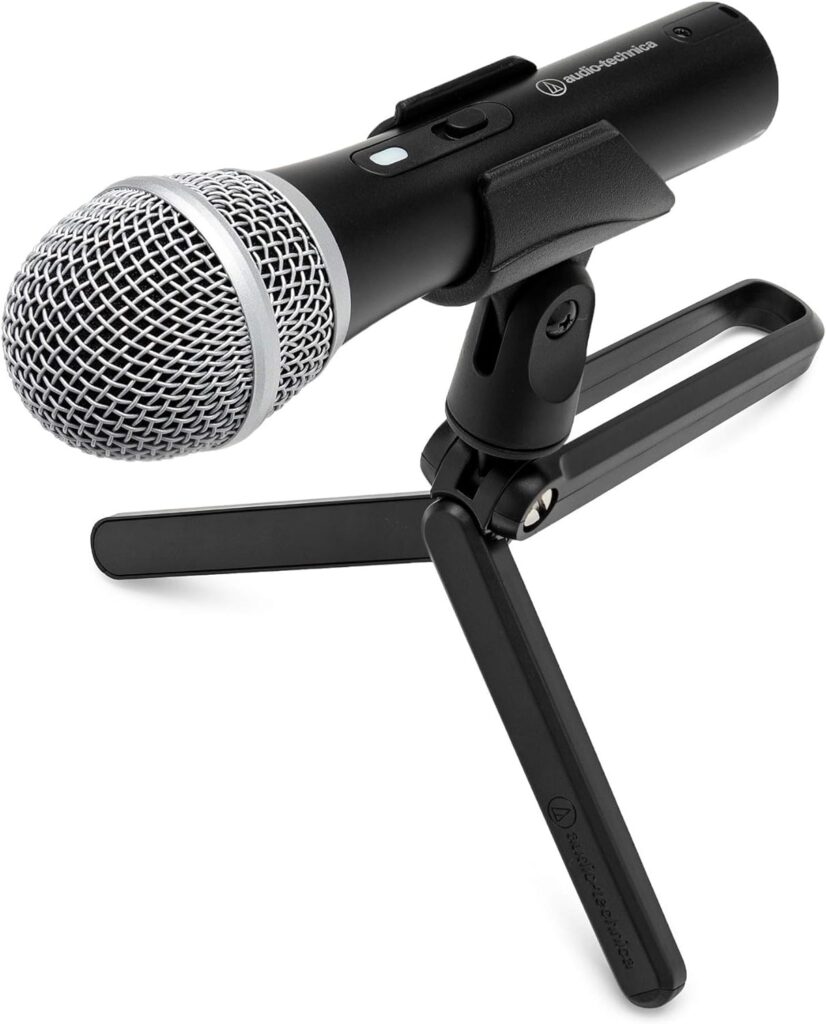
Best Quality Mic for Most People: Audio-Technica ATR2100x-USB ($49)
Absolutely incredible bang for your buck. This is a dynamic microphone, which means it naturally ignores background noise and room echo, focusing just on your voice. I’ve recorded hundreds of hours of audio on the ATR2100x and people always compliment me on my audio quality. Grab a cheap pop filter and get close to the mic – you’ll produce great audio.
I recored over 200 hours of Acquisitions Anonymous with this microphone – it’s fantastic and perfect for all but the most nerdy audiophiles.
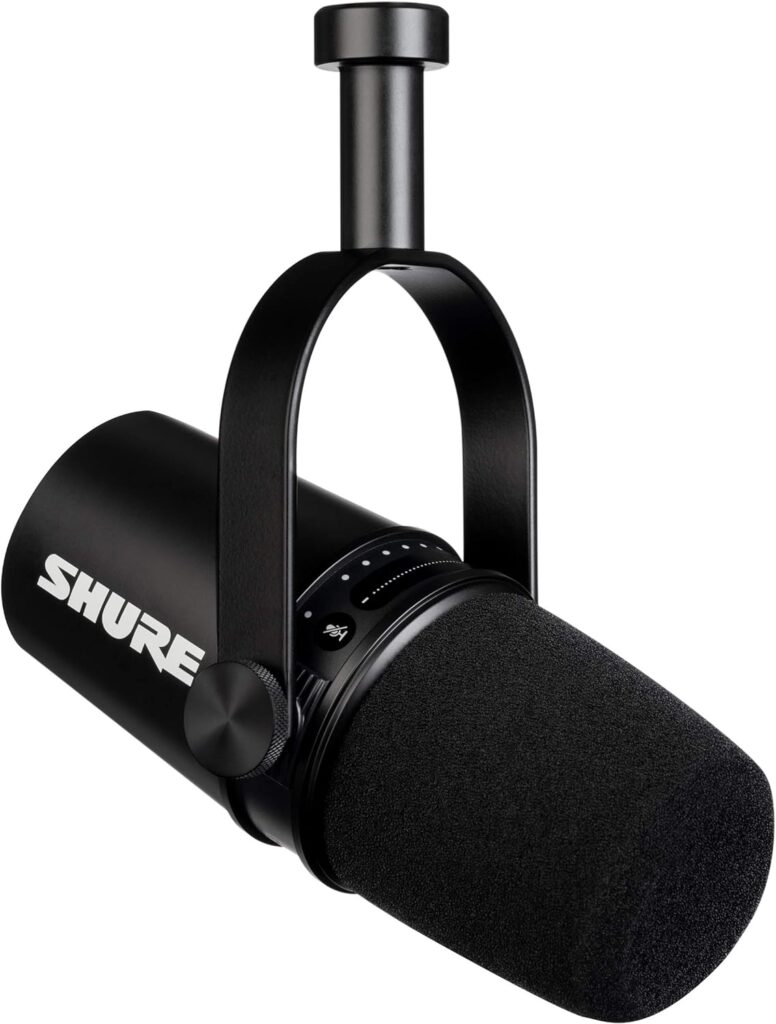
Upgrade Mic for Audiophiles and Nerds: Shure MV7 ($249)
If you’re the type of person that can appreciate high end audio equipment, you may be interested in the MV7 by Shure. It’s designed specifically for podcasting, and is modeled on Shure’s iconic SM7B microphone. It has a USB port so you don’t need to buy a dedicated audio interface.
This is the mic that I use, and I think it’s barely, almost imperceptibly better than the Audio-Technica, but it’s 5 times the price. Nearly all of the most popular podcasts are recorded on the MV7 or SM7B, but it’s probably overkill unless you’re producing a big time podcast.
Teleprompter Setup (Optional)
If you really want to create the “sitting across the table from you” look, you can put your camera inside a teleprompter, which creates perfect eye contact with your video conferencing counterparts. It’s also great if you are a content creator and want to read a script into the camera, or if you’re running for president.
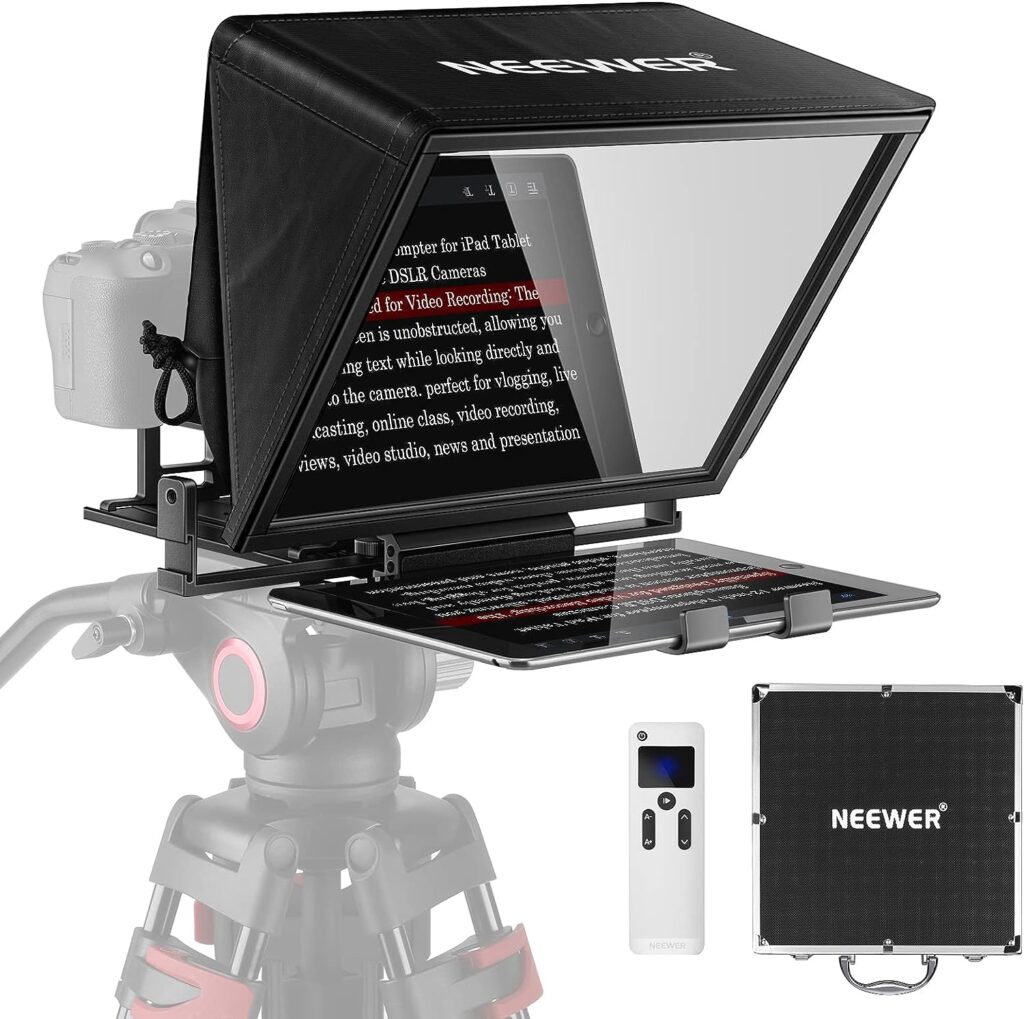
Teleprompter: Neewer Teleprompter X14 ($128 after coupon)
This is the teleprompter I have, and it is a great balance between size and price. It’s big enough to use with an up to 11″ monitor or iPad, but is barely above $100. The glass is super clear, and it comes with a nice hard carrying case. Note that the included remote is garbage, but you won’t need it.
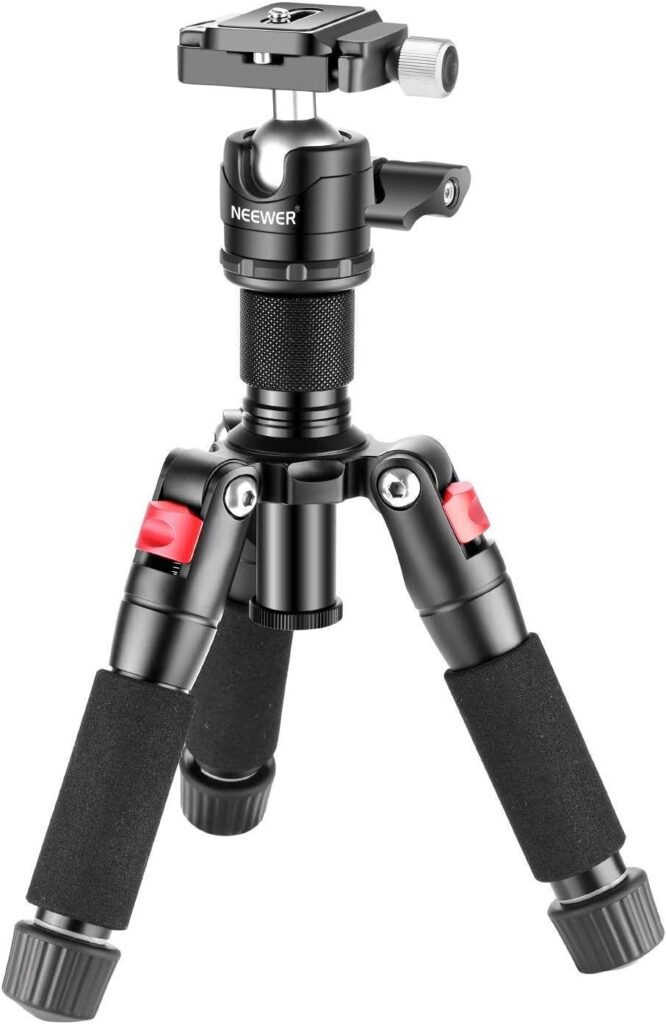
Tripod for Teleprompter: Neewer Portable Desktop Mini Tripod ($49)
The teleprompter above is meant to be mounted on a tripod, so you’ll need something to hold it up to your eye level. This tripod is super adjustable and sturdy, so you can use it on your desk and play with the height to get it exactly to eye level.
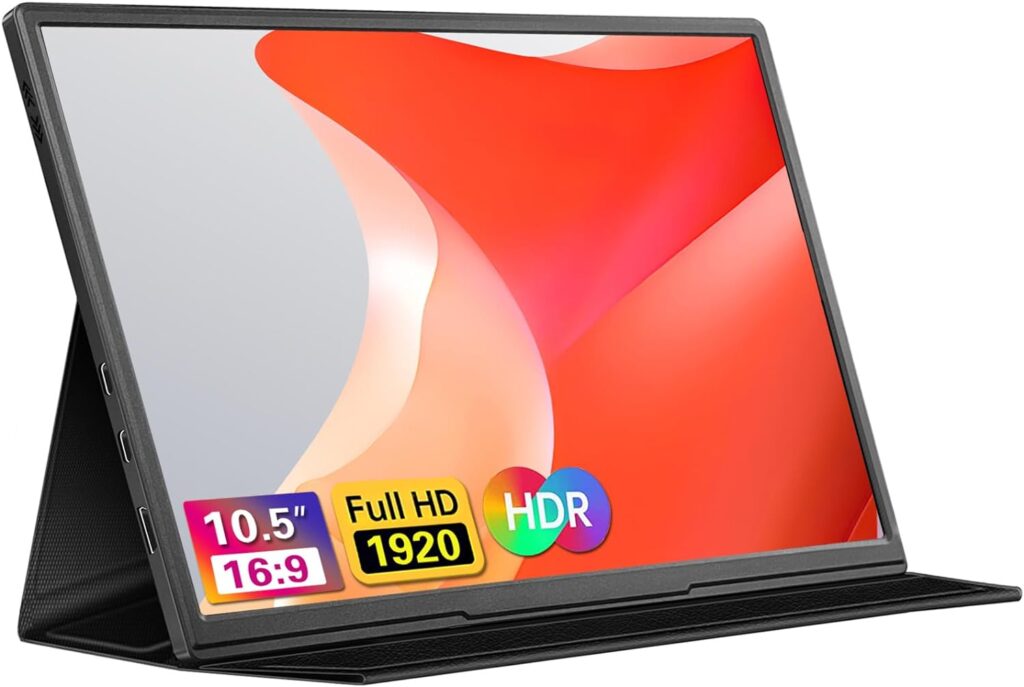
Dedicated Teleprompter Monitor: 10.5″ Portable Monitor 1920×1280 ($70)
This is the real trick to making the teleprompter work. Just drag your Zoom window (or any other window you want to see or read while making eye contact) right onto the external monitor, and you’ll see it in the teleprompter. This specific one is high resolution so faces look great, and is the perfect size to work with the X14 teleprompter.
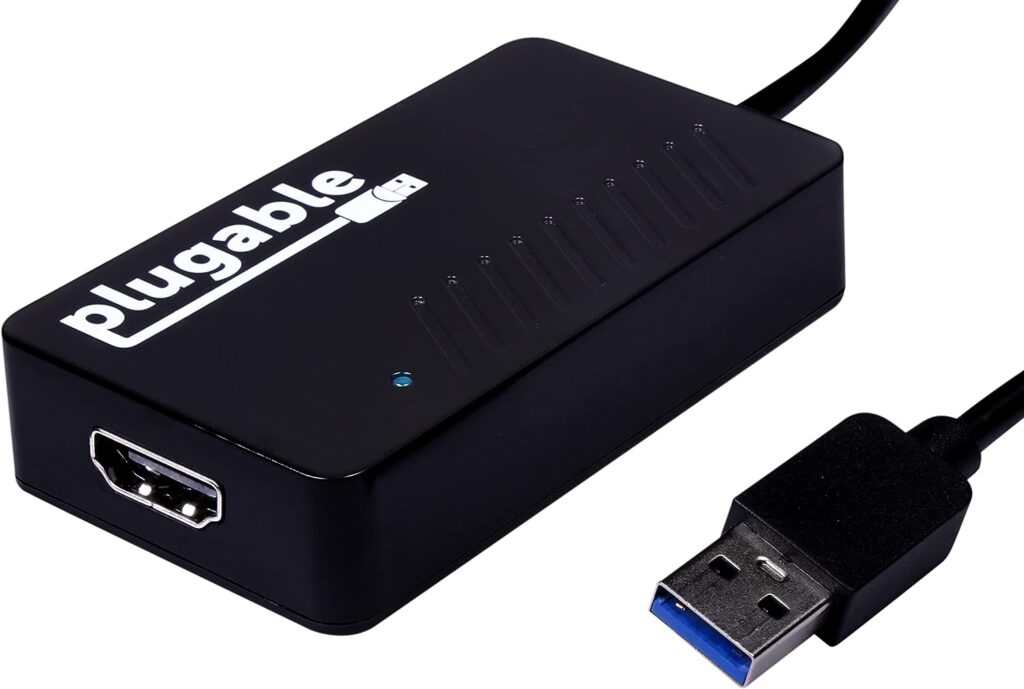
USB Adapter for Second Monitor: Plugable USB 3.0 to HDMI Video Adapter ($49)
Chances are, your computer only has one HDMI port for an external monitor, and you’re probably already using it. Additionally, if you have an M1/M2 Mac, it only supports one native external monitor without using this adapter.
This adapter allows you to connect the teleprompter monitor via USB 3.0 instead of HDMI. I’ve tested it and it works great with the above monitor and my M1 Mac.
Accessories
HDMI Capture Card (for ZV-E10 / ZV-1): Papeaso Video Capture Card ($19)
As long as your laptop has a USB 3.0 or USB-C port (nearly all PCs/Macs products in the last 5 years), there is no need to buy the expensive Elgato Cam Link. The USB 3.0 spec supports HDMI natively, so you really just need an adapter. This one has worked great for me and several other people I know.
Micro-HDMI Adapter (for ZV-E10 / ZV-1): Twozoh Left Angled Micro HDMI Adapter ($10)
The ZV-E10 and ZV-1 have a micro-HDMI port, so you’ll need an adapter. I like this L-shaped one so the cord doesn’t stick straight out the side of the camera. The left-angled version is the one you need based on the orientation of the ZV-1’s micro-HDMI port. If you get the ZV-E10, get the “straight” variant of this adapter.
Monitor Camera Mount (for ZV-E10 / ZV-1): Mokose Webcam Mount ($10)
Before I moved to a teleprompter setup, I had my ZV-1 sitting on top of my monitor, where a traditional webcam would go. This mount has a standard 1/4″ thread that will screw into the bottom of the ZV-1 (or the baseplate I recommend below) and allow you to mount it on top of your monitor if you’re not going with a full teleprompter setup.
Dummy Battery: DK-X1 DC Coupler USB Adapter Kit for ZV-1 ($18) or NP-FW50 Dummy Battery Coupler for ZV-E10 ($21)
You don’t want to worry about keeping batteries charged when you’re trying to run a Zoom meeting. This “fake” battery goes into the camera’s battery compartment and feeds constant power to the camera so it never runs out of juice. Just make sure you plug it into a power source that provides enough amperage (your USB hub probably does not, use a USB wall plug or powered hub like the one I recommend below).
Camera Base Plate (for ZV-1 only): Tosicam Base Plate for Sony ZV-1 ($19)
If you use the dummy battery above, you will have a cable snaking out of your ZV-1’s battery door, which means it won’t be able to close all the way. This base plate attaches to the bottom of your ZV-1, is specifically designed to create clearance for the battery door, and also gives you multiple 1/4″ screw holes to use when mounting the ZV-1. You do NOT need this if you go with the ZV-E10.
Microphone Boom Arm: InnoGear Microphone Arm Stand – Large ($47)
This is a nice to have. I like having the microphone up off my desk and able to be pushed away when I’m not using it. Get the large/long version – you always need more reach than you think you do.
Pop Filter for Mic: Anything from Amazon (~$4)
Also known as a “foam ball” or “clown nose” – this helps reduce the breathy mouth sounds (aka “plosives”) that can be captured when you’re close to your microphone (as you should be to get good audio).
Desk Mount for Lights: SmallRig Selection 19″-39″ Desk Mount ($44 for two)
I didn’t like the large base that the Key Light Air came with, so I bought these stands that clamp to the edge of my desk and give me some desktop space back. They have standard sized screw mounts that are compatible with almost any light, and also with the teleprompter I mentioned above. Very versatile.
Powered USB 3.0 Hub: Anker 10 Port 60W USB 3.0 Hub ($39 with coupon)
If you’ve followed my recommendations above, you’re going to need lots of USB 3.0 ports. You absolutely need a powered hub (that plugs into your computer but ALSO a wall outlet). Anker is a quality brand, which is important because it’s going to be powering your camera (via dummy battery) and your Key Light, while also handling 4k HDMI video from your camera and high quality audio from your microphone. All that can be plugged into this hub, giving you just one cable to plug into your computer.
Did this post help you? If it did, I'd love it if you'd sign up for my newsletter. I send out non-public stories, coaching tips, tricks, and funny stories every week. Enter your email address below.